In this blog post I'll take you through how to set-up Continuous Integration (CI) for a ASP.NET Core project using Microsoft Azure DevOps. To do this we need to use an Azure DevOps Pipeline, this Pipeline will carry out 5 build steps; Restore, Build, Test, Publish, Publish Artifact.
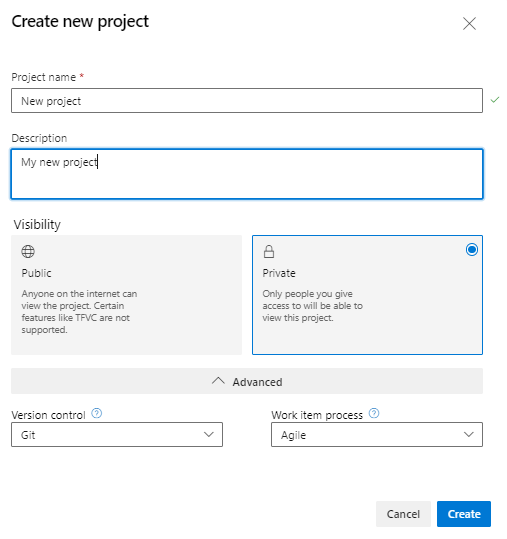
The first step is to go to https://dev.azure.com/ and create a New project.

Here specify the Project name, Description, Visibility whether the project should be public or private and the Advanced options for Version control and Work item process. Click Create once complete.
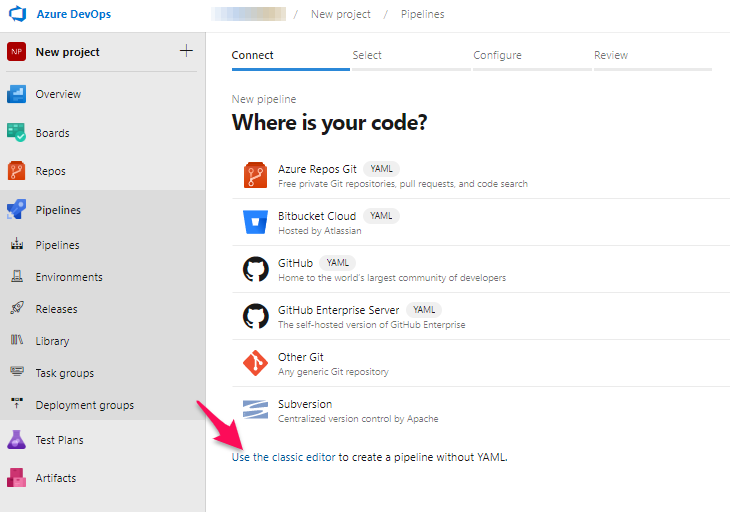
Now to step the actual Pipeline, click Pipelines and then Create Pipeline. You will see the screen below which gives you two options to set-up your new pipeline, either using YAML or Classic Editor. Here I'll show you how to set-up your pipeline using the Classic Editor as it is more UI friendly, whereas the more experienced DevOps would likely prefer YAML.
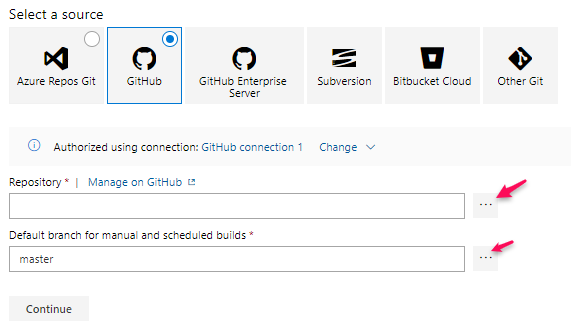
Next step is to select your repository, first select a source and authorise access, then select the Repository and the Branch to use. Here I'm using GitHub.
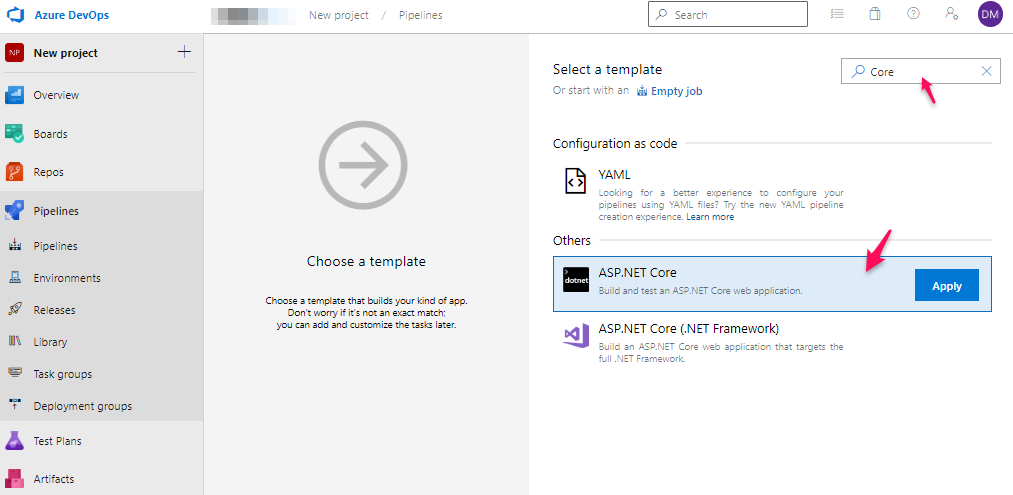
Next choose a template, so the Pipeline knows what type of application it is building. You can use the Search to search for a template or scroll the list and select the template of your choice. I have selected the ASP.NET Core and clicked the Apply button.
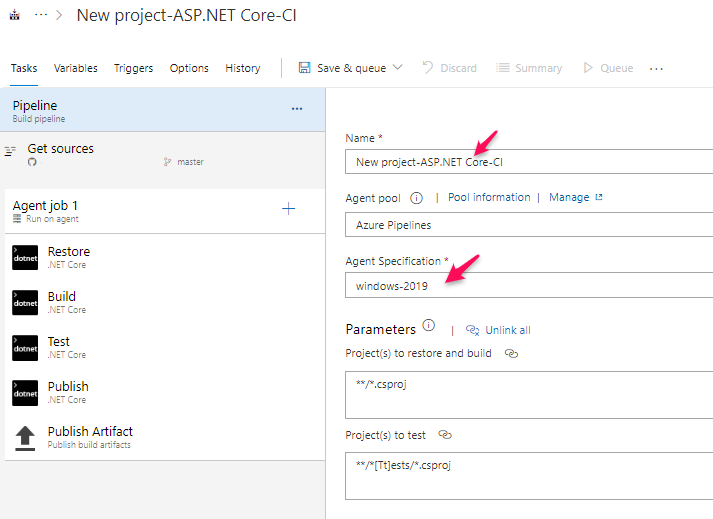
This will take you to a screen to set-up your actual Pipeline and automatically create your 5 default build steps; Restore, Build, Test, Publish and Publish Artifact. Due to using the Classic Editor all these steps are pre-populated with all the default options. Feel free to explore and modify any of these build steps, however for quickness I'd recommend leaving them as they are and just editing the Pipeline Name and selecting the Agent Specification.
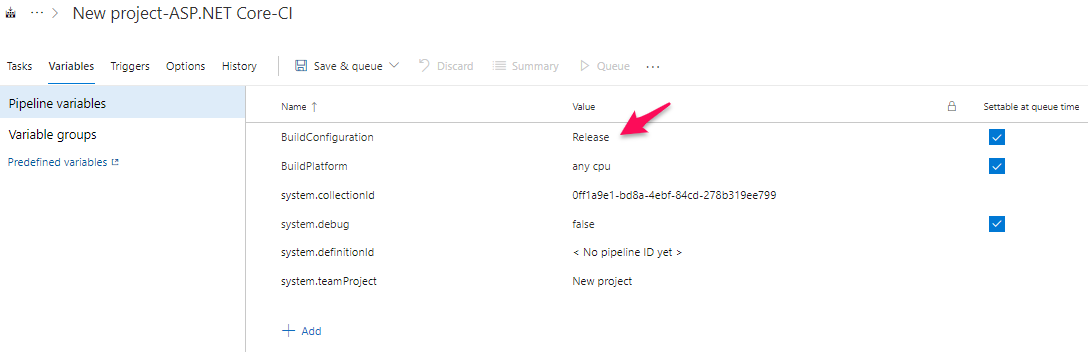
Some extra configurations to highlight is the Variables and Triggers tabs. If you have a specific build configuration you want to use and not the default Release, then edit the BuildConfiguration variable to your preferred choice. For example I changed this to Production.
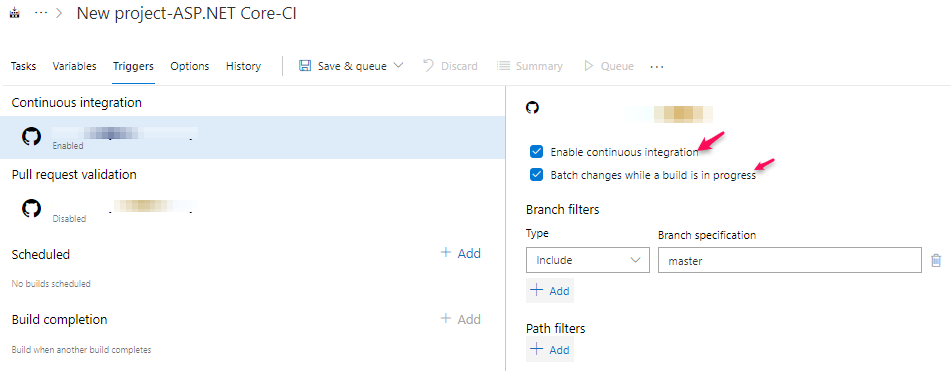
The other tab to look at is the Triggers tab. Under Continuous Integration we will check the two options for Enable continuous integration and Batch changes while a build is in progress. This set-ups the Pipeline to trigger and run when a commit is made to our GitHub repository master branch, and also batches up changes.
We have now completed our Continuous Integration Azure DevOps Pipeline, congratulations! To finalise and save, click the dropdown Save & queue and then click Save. To kick off the CI Pipeline either commit some new code to your GitHub master branch or you can manually run the Pipeline from within Azure DevOps. To run the Pipeline manually go to Pipelines, select the Pipeline you require and then Run pipeline.
Once the pipeline has complete and is successful a green tick will appear next to your pipeline. This means an Artifact (package) has now been created and is ready to be deployed to your environment. In my next blog post I'll take you through How to Set-up Azure DevOps Releases to Deploy to an Azure Web App Service.