In this blog article I'll take you through how to set-up Azure DevOps Releases to deploy an ASP.NET Core website to an Azure Web App Service.
Set-up Azure DevOps Pipeline to deploy to Azure Web App Service
First of all open up Azure DevOps and within your project, select Releases and click + New.

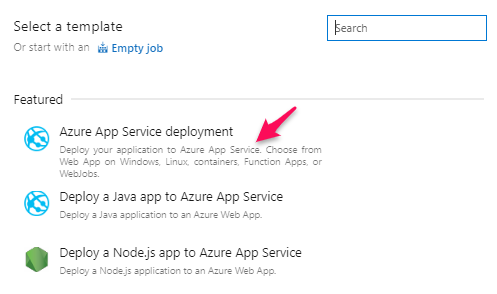
This will open up the Select a template, here select the Azure App Service deployment.
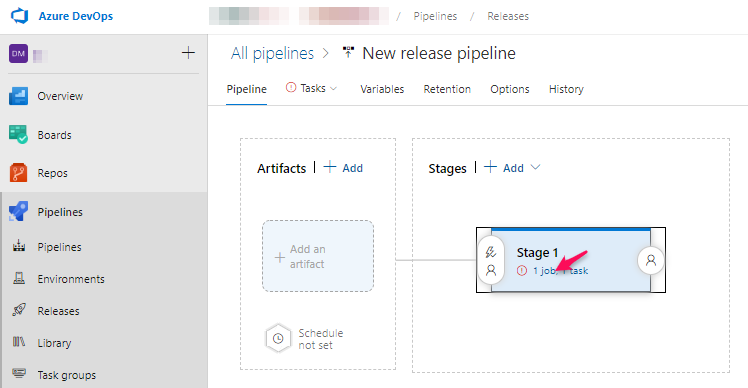
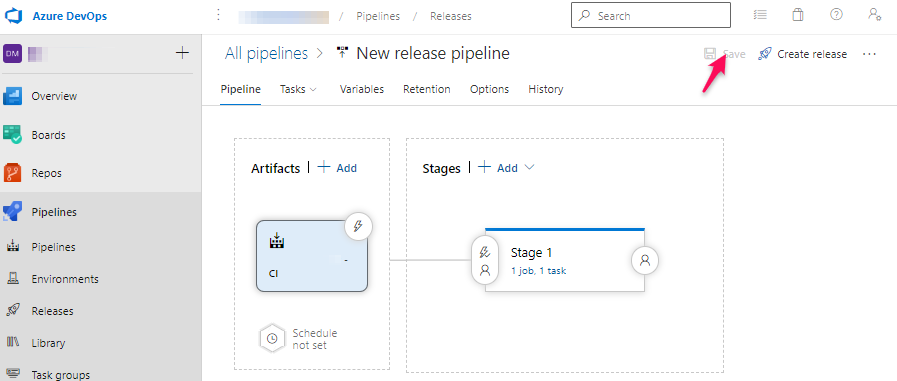
A new Release will be created with two boxes, Stage and Artifacts. Stage is where we will configure where you want to deploy, in our case an Azure Web App Service. Click the "1 job, 1 task" link underneath Stage 1.
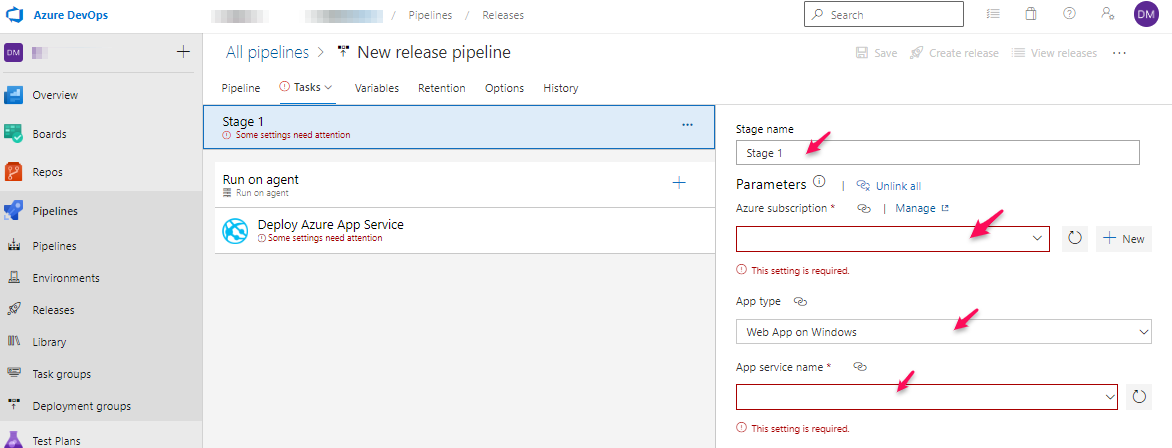
Feel free to change the Stage name, then complete the required fields by selecting your Azure subscription, the App type (Web App on Windows) and the App service name. Once complete click the Pipeline tab.
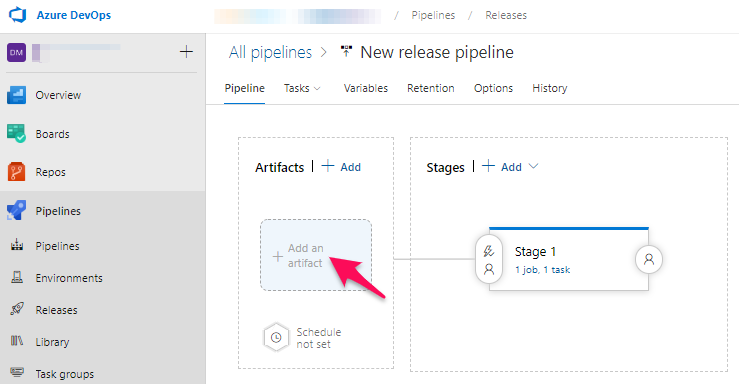
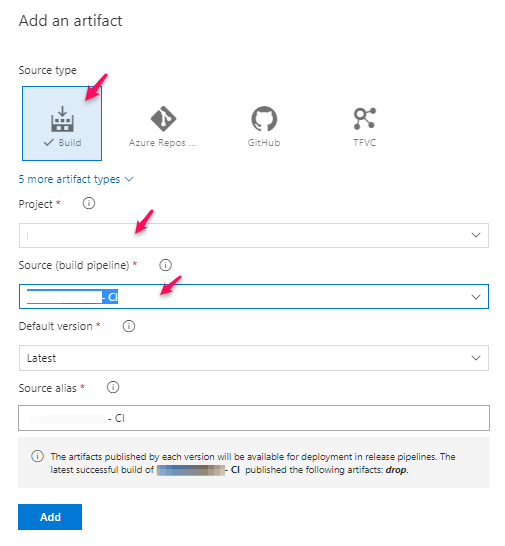
Next click Add an artifact to configure where we should look to find the artifact (package) to deploy.
This will open up the Add an artifact dialog, here select the Source type, we will select Build. Next select the Project and the Source (build pipeline) where the build artifact will be generated.
The configuration of the Release is now complete, to finish click the Save button.
Deploy to Azure Web App Service from Azure DevOps Pipeline
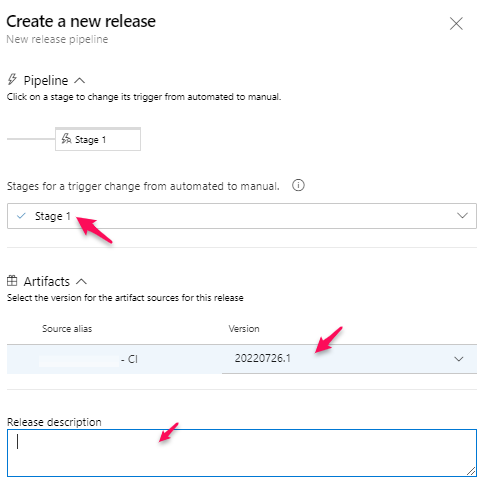
With the Azure DevOps Release now set-up we will now want to actually deploy to our Azure Web App Service. To deploy, open the Pipeline created above and click the Create release link top right. Here we will Create a new release to deploy, select the Stage 1 and then select the Artifacts Source and Version. Here I'm selecting the latest Artifact version. Finally type a description for the release.
This opens up the screen below, now that a new release has been created we are ready to manually trigger the deployment. To do so, click Stage 1 and then click the Deploy button.
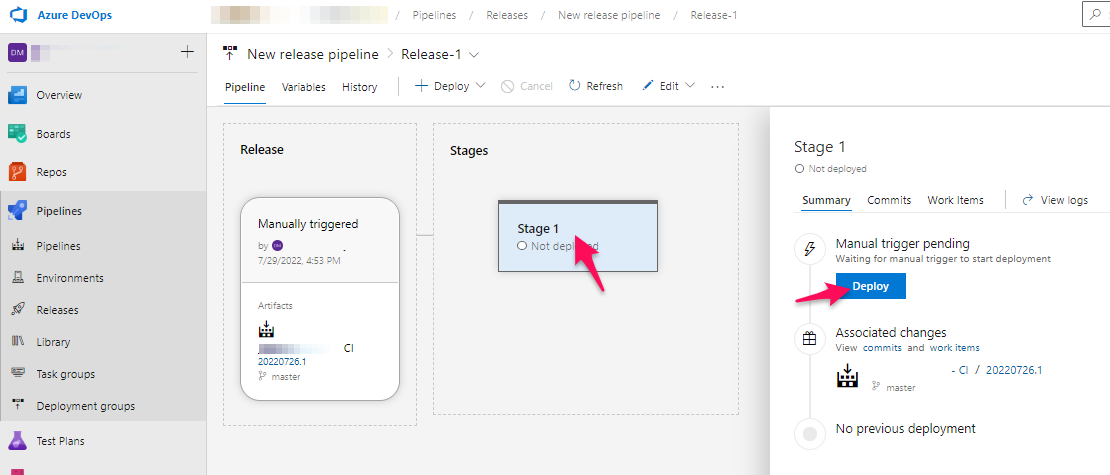
You will see your Release queued as per below and when it has completed successfully you will see the Stage 1 turn green with a tick.

To be sure of your deployment, go to your website and check to see if your changes have been deployed.
Thanks for reading this far and following my tutorial! You should now have a simple Azure DevOps Release set-up and ready to deploy at a moments notice with a couple of clicks.
Happy deploying!